Import a Model
It is highly recommended to start your project by importing your hydrologic model. This can be done using the '1) Import Model' button.
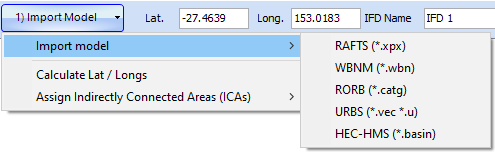
Importing a project will populate the subcatchment information including X & Y coordinate, local and total contributing areas and the total catchment area will also be filled in the Area field in the Areal Reduction Factors panel.

Since version 1.0.7, the calculation order is now displayed in the panel. This is used to determine the order of variable rainfall total or loss rates per subcatchment. It is most important for RORB and URBS and user should check this information when doing spatially varying projects. For other types of models, the calculation order is less important but in general, values of 0 indicate that the row is not a subarea (it may be a junction, sink etc) and therefore the assignment of IFD Locations for these rows is not relevant.
After importing your model, you will be offered the option to calculate lat/long coordinates for each of the subcatchments. This should only be done if the project has real world coordinates (eg., MGA Zone 56).
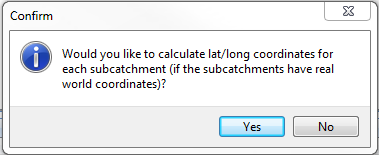
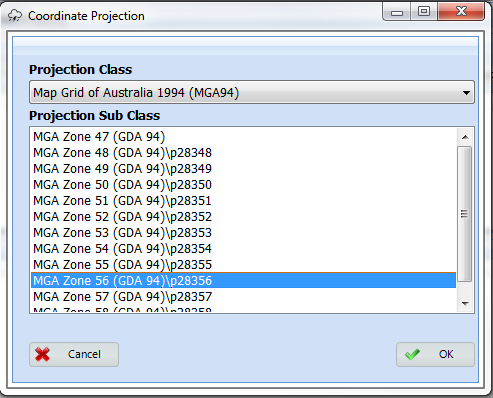
If you select Yes, you will be prompted to select the projection from which to convert the coordinates. By calculating lat/long coordinates for the subcatchments, Storm Injector will also fill the latitude and longitude fields based on the average lat/long values of the subcatchments which will make downloading the ARR HUB Data easier. It will also allow for subcatchments to be automatically assigned their closest IFD Location if you are doing a spatially varying analysis.
If your project does not have real world coordinates, select No. You can still take advantage of automatic assignment of subcatchment IFD locations by assigning project coordinates to your IFD locations. However, you will have to manually enter latitude and longitude values when downloading ARR Hub Data and IFD information.
Automatic Download (based on lat/long of centroid)
Storm Injector can automatically download data from the ARR Data Hub and the BoM IFD websites. A single ARR Data Hub download is required but multiple IFD download locations are supported for spatially varying IFD information.
ARR HUB Data
To download the ARR Data Hub information, the latitude and longitude should be entered in the Project Setup panel (if they have not already been populated by importing a model). Alternatively, you can upload a shapefile to the ARR Data Hub website, download the report and import into Storm Injector (refer Using Files Download Manually section).

Click the '2) Get Hub Data' button. This will bring up the browser form which will populate the ARR Data Hub information for the location.

ARR Data Hub Download
When the 'Ingest Data' button is clicked, this data will be read by the software and populated in the various panels for Temporal Patterns, Areal Reduction Factor (ARF) Parameters, Preburst Depths, Meta data and Interim Climate Change (ICC) Factors. Baseflow factors will also be downloaded into the Baseflow factors panel. However, if baseflow is important for your catchment, you should consider re-downloading baseflow factors for the catchment outlet (rather than the centroid) using the 2) Get Hub Data >> get baseflow factors from bottom subarea button.

Data Downloaded from ARR Data Hub
The point based temporal patterns will always be loaded by default. However, if the catchment area is greater than 75 km2, it will be suggested that the project switch to Areal Temporal Patterns.
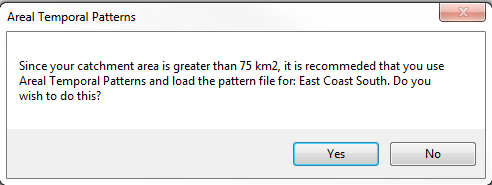
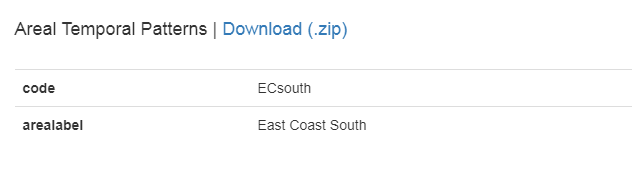
If Yes is clicked (recommended), then you will be prompted to load a file containing the relevant Areal Temporal Patterns. This file can be downloaded from the ARR Data Hub Website. Extract the zip file and load the *Increments.csv file when prompted.
Downloading IFD Data
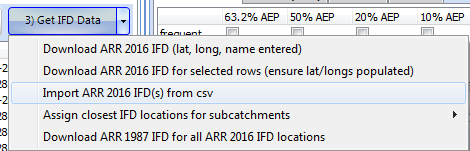
IFD data for a given location can be downloaded in a number of ways:
•Any lat/long position based on entering the lat/long in the fields and entering a name for IFD in the 'IFD Name' field and clicking '3) Get IFD Data' (if a model with real world coordinates was imported and converted to lat/long, then the lat/long fields will be pre-filled with the average of the catchment coordinates).
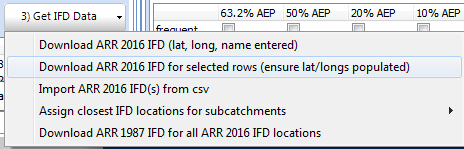
•By selected one or more rows in the model grid, you can then download multiple IFD location data by selecting the drop arrow on the 3) Get IFD Data' button and selecting 'Download ARR 2016 IFD for selected rows'. This will only work if lat/long values have been calculated or entered manually.
•Importing one or more csv files downloaded form the BoM ARR 2016 website.
When downloading ARR 2016 IFD data, the Browser window will appear. You may also note that the form has been pre-populated with all the Non-Standard Durations typically included in the ARR Data Hub Temporal Patterns.

ARR2016 IFD Download
When the 'Ingest Data' button is clicked, the data will be read and the IFD values populated in the Rainfall Depths table.
You can also copy and paste data from Excel into this table using Ctrl+C. Please be sure to include a header row and duration column.
Custom Data Hub IFD Data
The ARR Data Hub includes IFD data for specific areas including the LIMB areas and the Illawarra. These dataset will be served by the Data Hub if coordinates with these areas are passed. Storm Injector (v1.3.6 onward) will inform the user that custom IFD dataset are available and they can be downloaded (instead of the BoM ARR IFD information) using the 3) Get IFD Data >> Download Custom IFDs option (note, this will only appear if button Get Hub Data has been done with coordinates that yield a custom IFD dataset).

Download Custom IFDs
Custom IFD datasets can be downloaded for selected subcatchments similarly to BoM IFDs. However, a prefix can be applied to help differentiate the custom IFDs from BoM IFD.
Assignment of IFD Locations to Model Subcatchments
After the first IFD location is downloaded, all subcatchments will be assigned this IFD Location as their default IFD as shown in the IFD Location column in the model grid. However, each subcatchment can have a different IFD location assigned allowing spatially varying IFD projects to be undertaken. Once multiple IFD locations have been added to the project, they can be assigned to subcatchments in a number of ways:
•Manually (one at a time) by clicking in the combo box in the IFD Location column for each row in the model grid.
•Manually (in groups) by selecting multiple rows, right click >> Assign IFD location for selected rows >> IFD Location
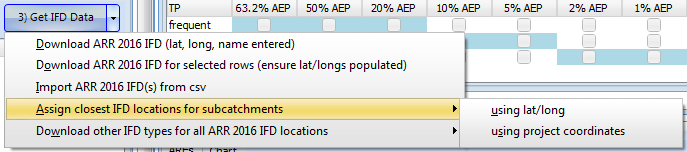
•Automatically assigning the closest IFD location based on the lat/long values of the subcatchments (assuming the imported model has real world coordinates that have been converted to lat/long). This can be done using the Get IFD Data drop menu and then 'Assign closest IFD locations for subcatchments >> using lat/long'
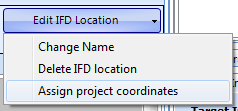
•If the imported model did not have real world coordinates, project coordinates can first be assigned to an IFD location using the 'Edit IFD Location' button and then 'Assign Project Coordinates'. Once the relative position of the IFD locations is known relative to the model coordinates, the closest IFD locations can be assigned to each subcatchment using the 'Assign closest IFD locations for subcatchments >> using project coordinates' option.
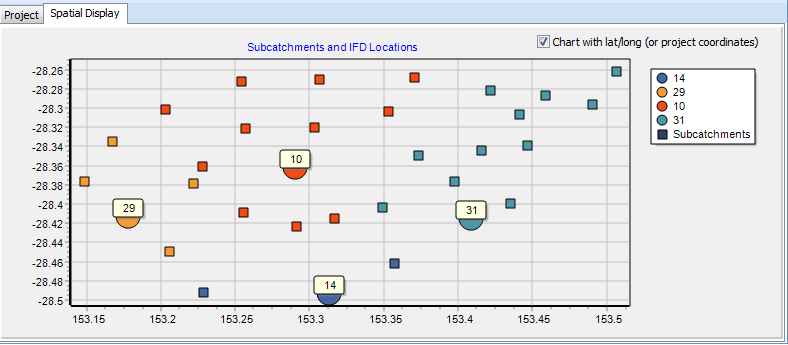
The Spatial Display tab gives a spatial indication of the location of the subcatchments versus the IFD locations and colours each subcatchment point with reference to its assigned IFD location.
ARR1987 IFD Data
Storm Injector has been designed for ARR 2016 analysis but can also undertake ARR 1987 analysis for comparison. It is intended that the user sets up all ARR 2016 IFD locations, assigns them to each subcatchment and then they can download ARR 1987 versions of each IFD location. In this manner, the same assignment of gauges will apply to both ARR 2016 and ARR 1987 scenarios.
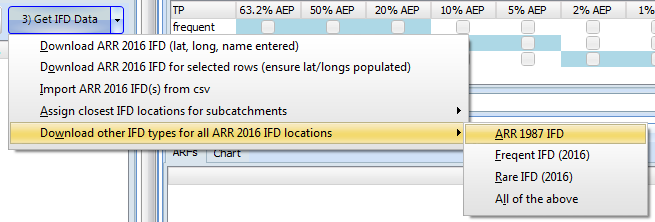
To download ARR1987 versions of all IFD locations, use the' Download other IFD types for all ARR 2016 IFD locations' >> ARR 1987 IFD option of the '3) Get IFD Data' button.

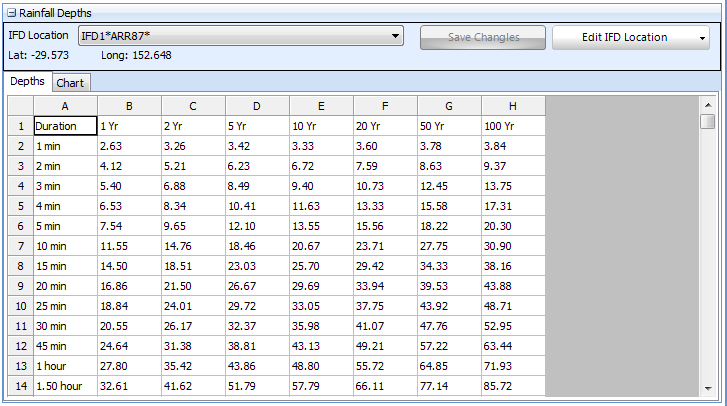
ARR 1987 IFD Data
The ARR 1987 IFD table will be calculated based on the A-G coefficients and all the durations from the ARR87 TPs and converted to total depth (instead of rainfall intensity) for consistency with the ARR2016 approach. Note that ARR1987 IFD Locations are identified by the *ARR87* suffix.
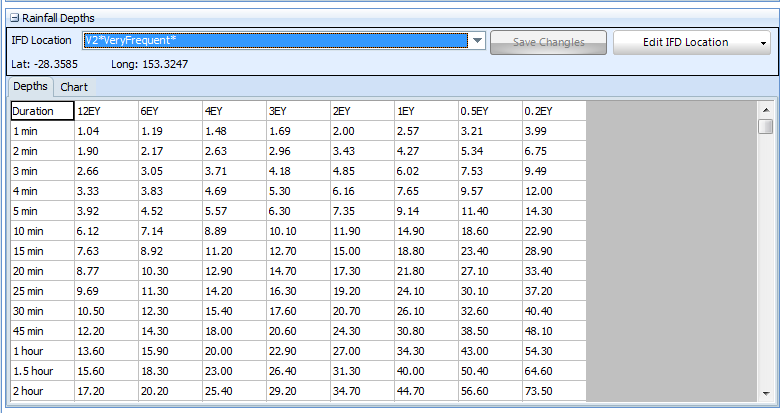
Very Frequent and Rare IFD Data
To download Very Frequent and Rare versions of all IFD locations, use the' Download other IFD types for all ARR 2016 IFD locations' >> Frequent (or Rare) of the '3) Get IFD Data' button. Note that these IFD locations are identified by the *VeryFrequent* and *Rare* suffixes in the Rainfall Depth panel.
Once IFD data has been downloaded, the appropriate events for storm generation can be selected.
Using Files Download Manually (Advanced)
You may wish to read in Data Hub files that have been downloaded manually. This may be useful if you have uploaded a shapefile of your catchment to the ARR Data Hub since the ARR Data Hub claims that some data will be averaged based on the catchment shape which may be more precise that simply using the centroid coordinates. In this case, upload the shapefile to the ARR Data Hub as instructed. At the results page, first click on the Download (.zip) button for Temporal Patterns (or Areal Temporal Patterns if your catchment is over 75 km2) and save the .zip file to your computer. Next, click on the 'Download TXT' button at the bottom of the page. At this point, right click on the new webpage and click 'Save As' and save the text file to your computer. Finally, unzip the temporal patterns zip file.
Click on the drop down arrow at the side of the Get Hub Data button and select 'load text file'. Then select the text file you saved from the website.

Next, right click on the Point (2016) tab in the Temporal Patterns panel and click 'Import TPs' and select the *Increments.csv file you extracted from the zip file that was downloaded.
To load a downloaded BoM IFD CSV file, click the drop down arrow at the side of the button 'Get IFD Data' and select 'Advanced - load from csv file'.
An example of the ARR Data Hub text file format can be found here: ARR Data Hub Text File.
An example of the BoM IFD CSV file format can be found here: BoM IFD CSV File Format