Overview
Aquaplaning (or hydroplaning) can occur when a thin layer of water accumulates on a road surface during a rainfall event. It can result in loss of control and has been the cause of numerous vehicular accidents and fatalities. Risk factors for aquaplaning include:
•Speed
•Rainfall intensity
•Water depth
•Road surface texture
•Vehicle tyres
•Driver behavior
Most of these are outside the realm of the road designer, however, it is prudent for all road surface designs (both new and rehabilitated surfaces) to satisfy some simple design principles including:
•Minimise sag points and ponding locations
•Minimise long shallow grade flow paths
Usually, this design process is relatively straight forward, however, occasionally more complex designs including crowned, projected cross section and staged lane rotation may present road geometry at high risk of aquaplaning. CatchmentSIM offers to ability to highly automate aquaplaning risk analysis ensuring that high risk areas are not missed and the assessment is done in a consistent and reproducible manner.
CatchmentSIM includes an aquaplaning script to automate the calculations required to carry out an aquaplaning risk analysis on any roadway alignment. The aquaplaning script that has been developed by Catchment Simulation Solutions is provided with CatchmentSIM, and allows the user to select from the two most widely used methods to calculate aquaplaning risk, the Gallaway Equation (used by the Queensland Department of Main Roads) and the Road Research Laboratory (RRL) Method (Used in New Zealand and other Australian States).
The appropriate method for use is typically adopted at an organisational level based on the standard methods and field testing by the organisation.
CatchmentSIM aquaplaning macro script
The CatchmentSIM aquaplaning macro script has been developed to minimise the requirement for manual calculations and provide a mechanism for reproducible results, as well as allow efficient re-calculation if any alteration to the roadway design is made. The aquaplaning script is primarily aimed at users of the 12d Model software due to its widespread use as the primary roadway civil design suite as well as the automated export and project setup macro plug-in available for 12d, however, the script can be used on any DEM, and hence users of other roadway design packages are still able to utilise the script. An example of the steps required to run an aquaplaning analysis from 12d is provided below, and similar steps can be followed to apply an aquaplaning analysis to other civil design software packages.
The script is accessed through 'Export >> Macro Wizard >> Aquaplaning >> Aquaplaning - (Gallaway and RRL eqns).cst'
The first input required is to choose between the Gallaway equation and the RRL Method. Once an appropriate method is chosen, input of a uniform design rainfall intensity is required. Next, the user is required to enter an appropriate wearing surface texture depth (only if Gallaway equation is being used), and the below image is provided to the user to allow the appropriate selection of the texture depth.

Click to Enlarge Image
The script then allows the user to specify a maximum allowable water film depth. This value is used to set a threshold minimum depth of concern to the roadway designer for aquaplaning risk. This threshold is also used to resrict reporting results to those flowpaths that exceed the threshold, and only these are included in reporting and visual results. The macro script will then create flowpath length, flowpath depth and flowpath slope grids in which will be used to populate the Gallaway equation and determine the Aquaplaning risk for all flowpaths along the roadway alignment.
The output from the CST script includes the grids of flowpath length, slope and depth, as well as flowpaths that exceed the threshold specified. Additionally, a results text file (see image below) is produced which details the flowpath ID, Flowpath Origin, Flowpath length, Flowpath Slope, and the water film depth (calculated by the chosen method) of all flowpaths that exceed the threshold.

Click to Enlarge Image
In addition to these outputs, CatchmentSIM allows the user to export the flowpaths that exceed the threshold to a 12da format, which can be imported into 12d and utilised further to improve the design of the roadway to reduce the aquaplaning risk.
See below for an example of how an aquaplaning risk assessment can be completed from a 12d tin, and then the results imported back into 12d to assist in the re-design of the roadway.
Aquaplaning Example
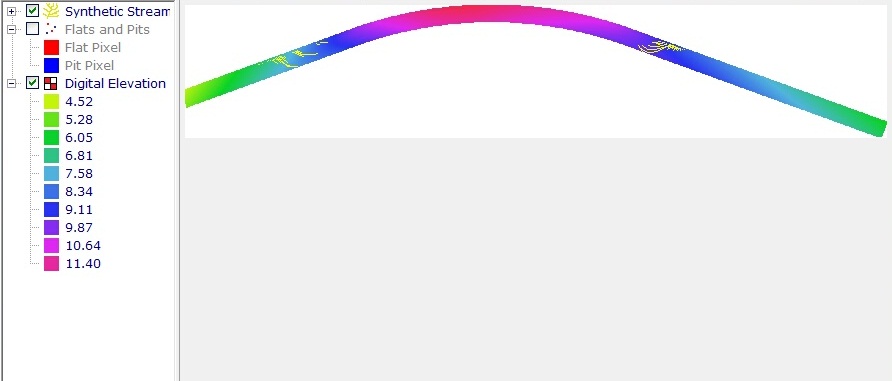
This example takes a staged lane rotation road surface TIN in a design package (such as 12d Model) and imports the data into CatchmentSIM to undertake an assessment of aquaplaning risk. The 12d to CatchmentSIM interface plug-in within 12d can be used to expedite the export of a roadway tin and setup a CatchmentSIM project, condition the DEM and allow the user to quickly carry out an aquaplaning risk analysis.
A video of this example is provided on the CatchmentSIM website, and is available from http://www.csse.com.au/downloads/Videos/Aquaplaning.htm
Firstly, the TIN model is exported from 12d Model as a 12da (12d ASCII) file. This can be automated by utilising the 12d-CatchmentSIM Interface (Available for download from www.exds.com.au). Once installed, this interface can be opened in 12d by navigating to 'Design >> Add ons' The Tin field should then be populated with the TIN representing the roadway alignment. The grid spacing (grid size) field should also be populated and should be chosen carefully, as a small grid size on a large alignment will lead to large processing times. It is suggested that a 1m grid be used as a default, which can be adjusted smaller for really small areas of analysis, or made larger for larger areas of analysis.

Click to Enlarge Image
Once these fields have been populated, the finish button can be selected, which will automatically export the 12d tin, open CatchmentSIM, setup a project and sample in the tin, and then hydrologically condition the DEM.
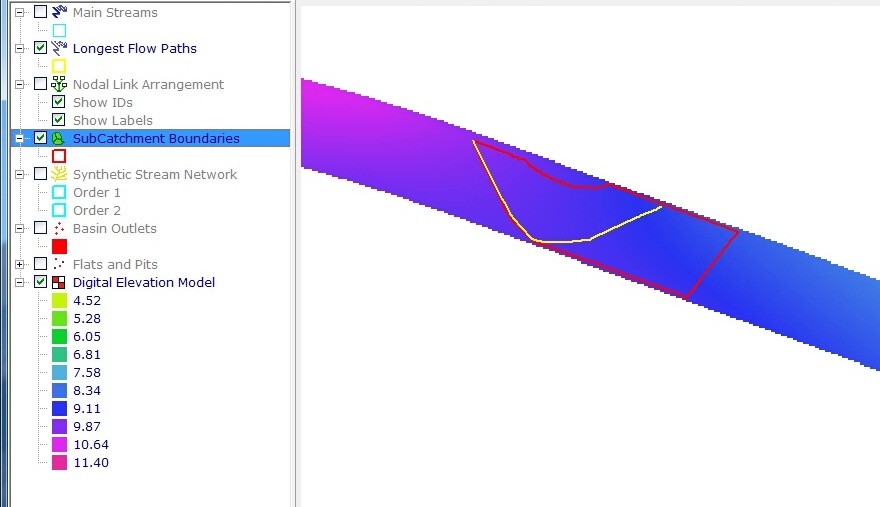
Next, subcatchment outlets need to be specified. These are typically the gutter, edge of pavement, or edge of outside travel lane lines that are usually contained within the 12d roadway design. To export these from 12d, utilise the usual export function and save the appropriate model as a .12da file. Once this is complete, import the edge of road/gutter alignment into CatchmentSIM by using 'Subcatchments >> Import Outlets >> From Vector File' and then navigating to the exported .12da file.
Catchments should then be mapped, and this is achieved by selecting Subcatchments >> Map All.
Next, the aquaplaning macro script can be run, and is accessed through 'Export >> Macro Wizard >> Aquaplaning >> Aquaplaning - (Gallaway and RRL eqns).cst'
For this example, the Gallaway equation will be used, so select Gallaway equation from the first dialogue. Next, enter a Design Rainfall, say 50 (mm/hr). You are then required to enter a roadway texture depth, say 0.5 (mm). A maximum water film depth then needs to be specified, say 2.5 (mm). The script will then carry out all necessary calculations (including the creating of flowpath slope, length and depth grids), and at the completion of the calculations, a save dialogue will appear allowing the user to select a location to save a text file detailing the flowpath details that exceed the maximum water film depth threshold set earlier.
You can see the flowpaths that exceed this threshold by visually inspecting the roadway alignment within CatchmentSIM. You can also turn on the Flowpath Depth grid layer which will indicate areas in which depths are quite high and can instantly indicate areas of the alignment which may require re-design in order to remove the aquaplaning risk that is present.
12D >> 12D Aquaplaning), and then imported into 12d via the 12d-CatchmentSIM interface by simply clicking Import Results, and then Finish. You can then add the Catchsim Aquaplaning model to the view, and selecting the flowpaths will allow all the attributes of the flowpath to be displayed (equal areas slope, length and depth).

Click to Enlarge Image