The import spot heights menu allows x y z files and LiDAR data to be imported into CatchmentSIM. The XYZ files may be either tab, space or comma separated (select by File Dialog Filter) and may or may not have a header row. LiDAR data files must be in LAS file format.
The Import Spot Heights menu item is the preferred method for importing 12d DEM data. The procedure is:
1.Grid the data in 12d at the preferred DEM resolution;
2.Setup a CatchmentSIM project with the same projection;
3.Setup a blank DEM with the same resolution and extents are the 12d griding;
4.Import the spot heights using the import spot heights into DEM menu option.
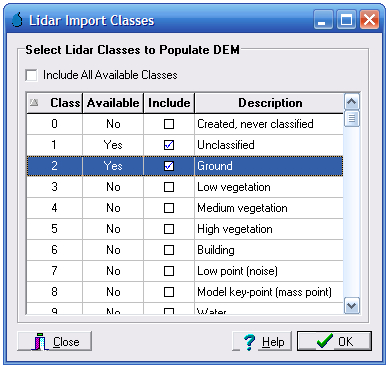
To use LiDAR data to populate the DEM, select the import spot heights menu item and select the required *.las file(s). CatchmentSIM will read each LiDAR file to determine which data point types are available. Once the program has finished reading each LiDAR file, a form will appear displaying the available data point classes that can be used to populate the DEM, as shown below. To use all the data point classes to populate the DEM, ensure the 'Include All Available Classes' check box is selected. However, if you only wish to use some of the available data point classes (e.g., just ground points), place checks beside the desired point classes and click the 'OK' button. CatchmentSIM will populate the DEM using only the selected point classes.
NOTE: if only some of the available LiDAR point classes are used to populate the DEM, the resultant DEM may have some pixels with no elevations assigned. Elevations can be assigned to these remaining pixels by selecting Create DEM >> Interpolation Tools >> Interpolate Remaining Areas.